

Are you eager to explore the world of cybersecurity, penetration testing, or ethical hacking on your MacBook with the latest Apple chips, such as M1, M2, or M3? Look no further! In this step-by-step guide, we’ll walk you through the process of installing Kali Linux, the renowned Linux distribution for penetration testing and digital forensics, using the powerful virtual machine emulator, UTM.
Step 1: Download and Install UTM
Firstly, head to your preferred browser and search for “UTM download”. UTM, short for Universal Type of Machine, is a versatile virtual machine emulator that supports various operating systems, including Kali Linux. Click on the official UTM website link and download the application. Once downloaded, simply drag and drop UTM into your Applications folder to install it on your MacBook.
Step 2: Obtain Kali Linux ISO Image
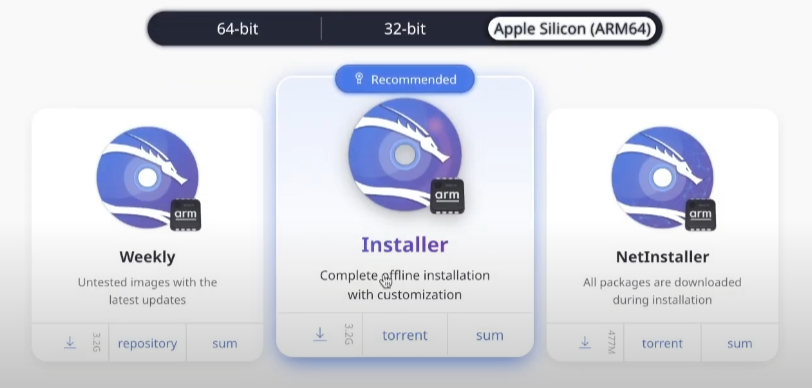
Next, navigate to your browser again and search for “Kali Linux download”. Visit the official Kali Linux website and proceed to the “Installer Images” section. Ensure to select “Apple Silicon” and download the recommended installer image. This ISO file will serve as the installation media for Kali Linux on your MacBook.
Step 3: Configure UTM for Kali Linux Installation
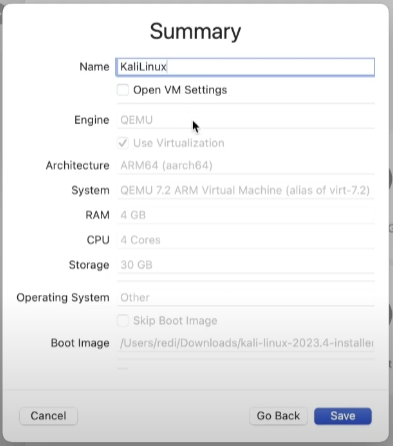
Launch UTM from your Applications folder and select “Create a new virtual machine”. Choose “Others” as the operating system type and browse for the Kali Linux ISO image you downloaded earlier. Configure the virtual machine settings according to your preferences, allocating sufficient RAM and CPU cores for optimal performance. Once configured, save the virtual machine settings.
Step 4: Enable Serial for Terminal Access
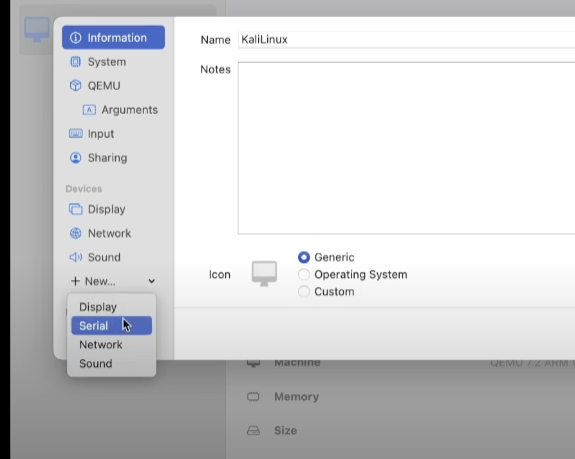
Before starting the virtual machine, it’s crucial to enable the Serial option within UTM settings. This allows access to the terminal during the initial setup of Kali Linux. Simply right-click on the virtual machine, select “Edit Settings”, click on the “+” icon, and add a new serial terminal. Save the settings to proceed.
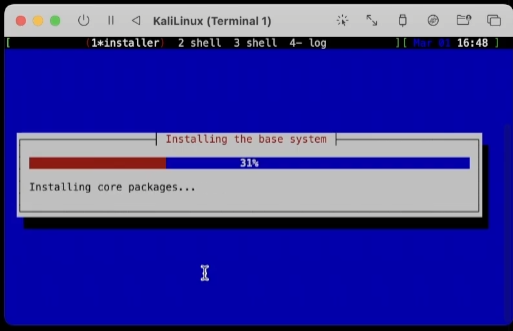
Step 5: Install Kali Linux
Now, it’s time to initiate the installation process. Start the virtual machine by clicking the “Play” button within UTM. A terminal window will open alongside the virtual machine, providing access to the installation process. Follow the on-screen instructions to set up Kali Linux, including language selection, partitioning, user account creation, and password setup.
Step 6: Adjust Display Settings (Optional)
After the installation is complete and the virtual machine restarts, you may want to adjust the display settings for a smoother experience. Within UTM, navigate to the CD/DVD section and clear the ISO file to ensure the virtual machine boots from the installed Kali Linux OS. You can then maximize the virtual machine window for full-screen display.

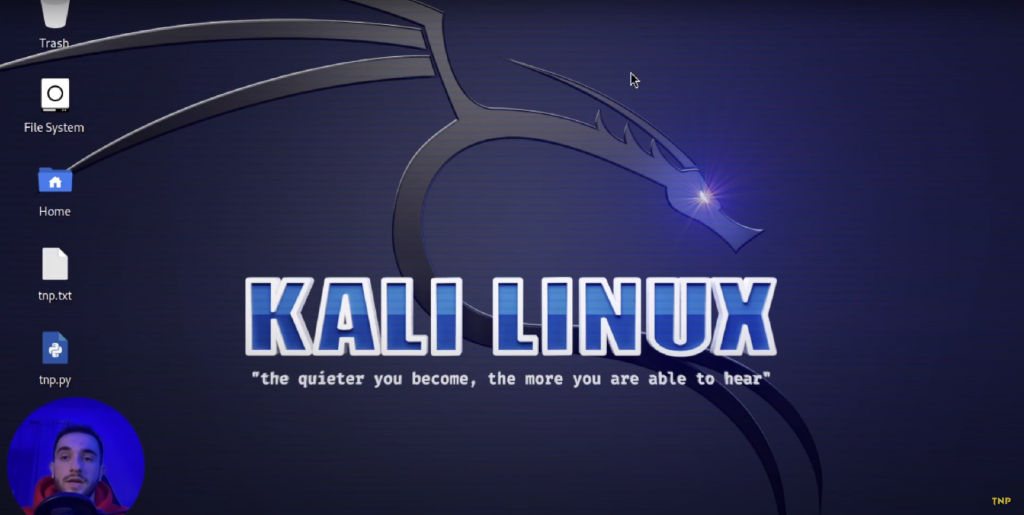
Step 7: Explore Kali Linux on Your MacBook
Congratulations! You’ve successfully installed Kali Linux on your MacBook with an Apple chip. You can now delve into the vast array of cybersecurity tools, penetration testing utilities, and ethical hacking techniques offered by Kali Linux. Whether you’re a cybersecurity enthusiast, student, or professional, Kali Linux provides a comprehensive platform for various security-related tasks.
In conclusion, installing Kali Linux on a MacBook with an Apple chip is made seamless and hassle-free thanks to the powerful capabilities of UTM. With this setup, you can harness the power of Kali Linux alongside macOS, expanding your capabilities and exploring new horizons in the realm of cybersecurity.
cdcd
Hello,