
Hey everyone today I am going to help you and explain how to fix the resolution of the window in VirtualBox after you have installed Ubuntu 22 or any other system. This solution will work for any operating system. Ok, let’s start…
1. You have to insert the Guest Addition Disc Image
This is the disc image that have to be inserted in the operating system in order to run different files which will make available the fix of the resolution of the screen in the operating system. To insert this disk image you have to go to the Device menu of the VirtualBox, and click Insert Guest Additions CD Image. You can refer to the image below 👇
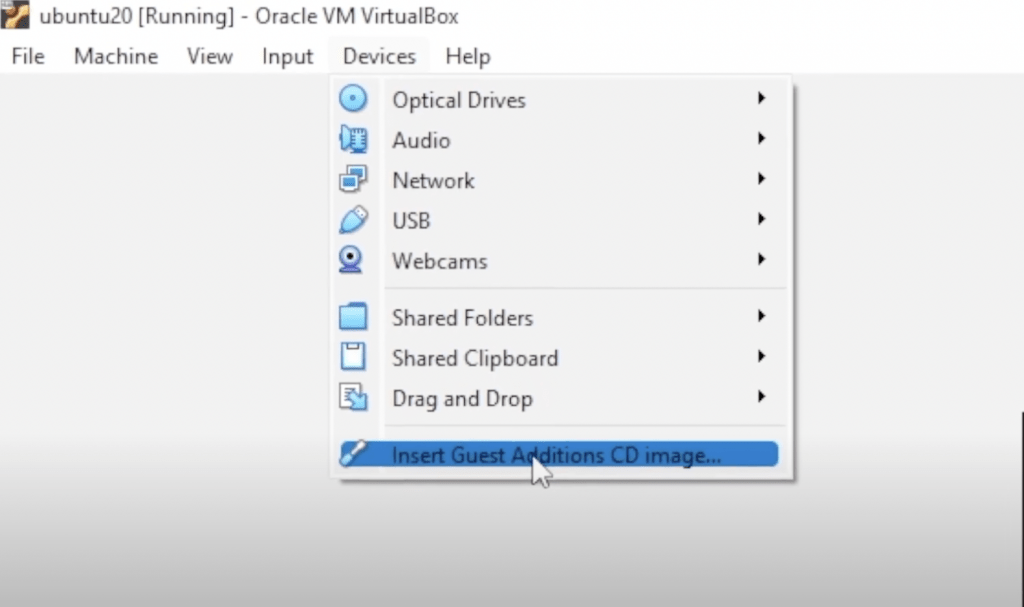
After you click that option, the operating system of your virtual machine will show a disc icon that contains some files.
2. You have to run the Addition file
Now you have to run the Addition fix file for your operating system. So, if you are running Ubuntu 22 on your virtual machine you have to run the Addition file for Linux. To run this file you have to use the terminal, so go ahead and right-click in the folder, and click Open in Terminal.
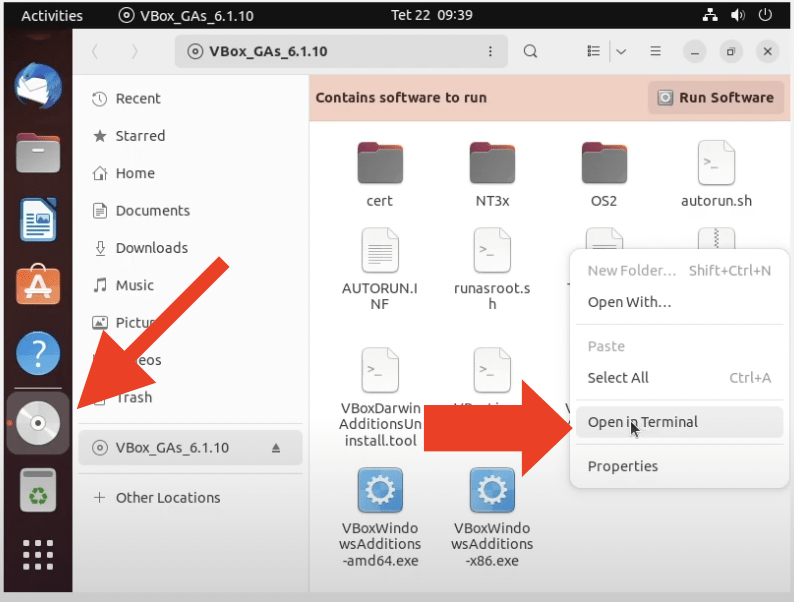
Now the terminal will open inside that folder and you can run the VBoxLinuxAddition.run file if you are running Ubuntu or if you are running windows you have to search for the .exe file.
To run the file type the command below in the terminal and press enter:
sudo ./VBoxLinuxAdditions.run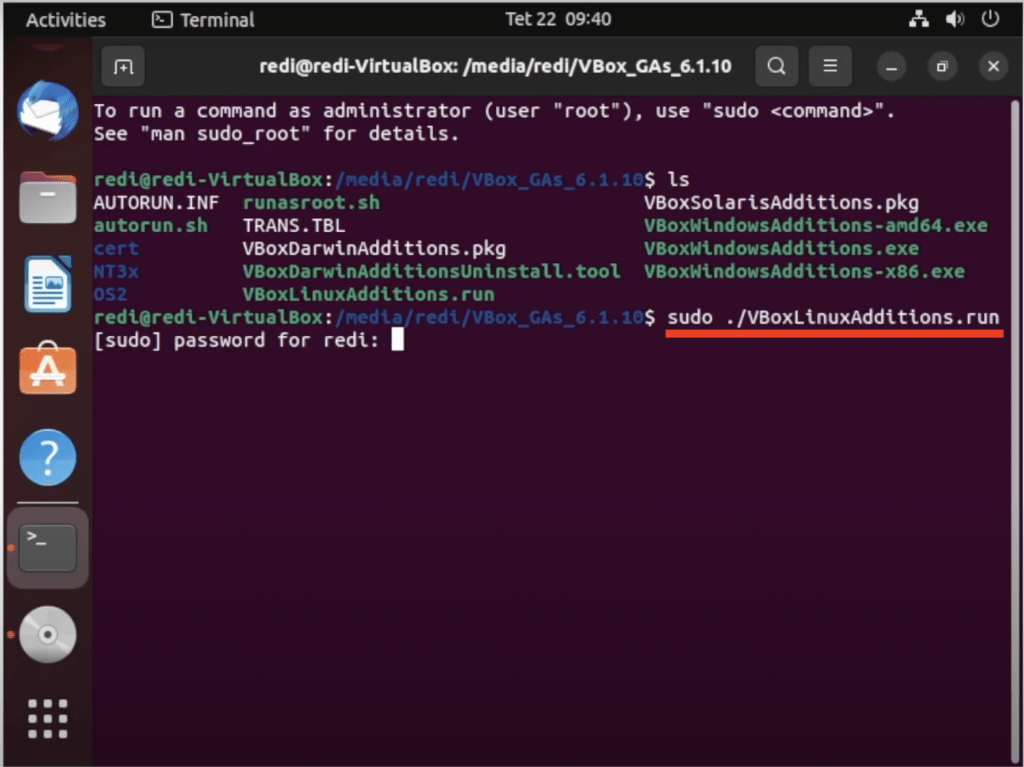
3. Restart your virtual machine
After you install the things we mentioned above you just have to restart the operating system and go to the full screen. Now the resolution should be fixed and everything ok.
If you have any problem during this process you can follow up my video on youtube –> https://www.youtube.com/watch?v=hYaCCpvjsEY
Rejebeeebbjje